A Provisioning package method can be used for bulk enrollment of Windows devices to Microsoft Intune. A provisioning package add devices in bulk to Azure Active Directory (AAD) and automatically enroll those devices into Microsoft Intune. This method can be used for corporate owned devices. This enrollment method requires a provisioning package which can be created using Windows Configuration Designer.
Once a provisioning package is created it can be executed on Windows 10 / 11 devices to enroll them to Microsoft Intune. The package can be executed during Windows initial setup or post setup.
Related post: Enroll Windows 11 Device to Intune through Azure AD Join method
Create a Provisioning Package
We need Windows Configuration Designer to create a Provisioning package. The application can be installed from Microsoft Store.
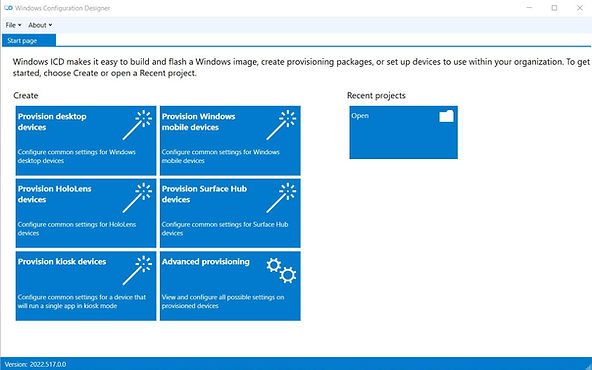
Open Windows Configuration Designer and select Provisioning desktop devices.
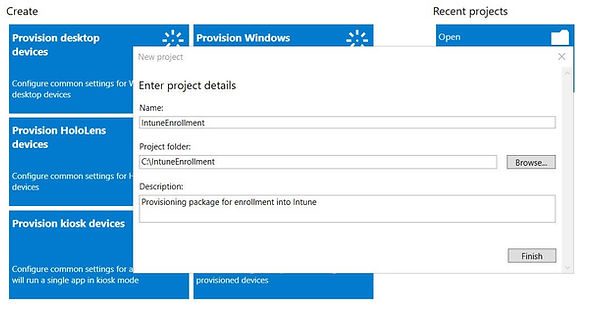
On the New Project window, specify the following information:
- Name – Name for your project
- Project folder – Location where you want to save the package
- Description – description for the project
Click on Finish.
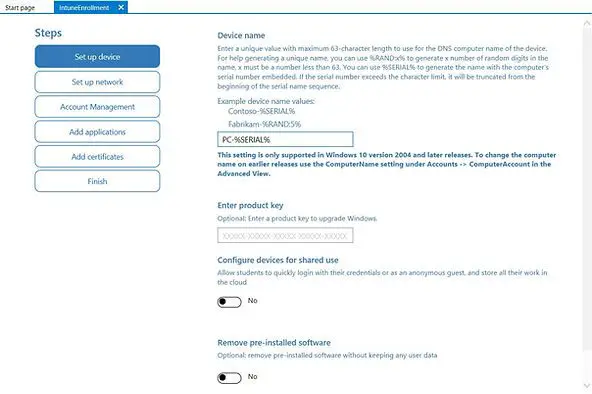
On the Set up device page, provide the following details.
- Device name: Enter a unique name for your devices. The name can be based on device serial number or random set of characters.
- Product key: Optionally, you can enter a product key if you want to upgrade windows edition.
- Configure devices for shared user: You can enable and configure this option if device is to be used by shared users.
- Remove pre-installed software: You can enable and configure this option if you want to remove pre-installed software’s.
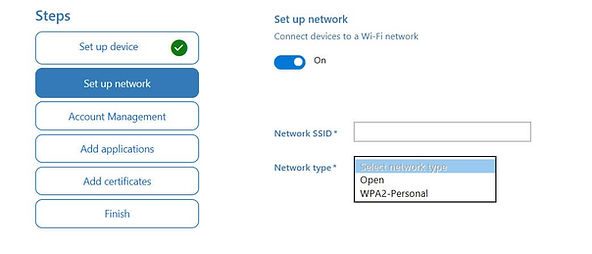
On the Set up network page, configure the WI-Fi network devices connect to when they first start. This is an optional configuration. If the Wi-Fi network is not configured, a wired network connection is required when device is first started.
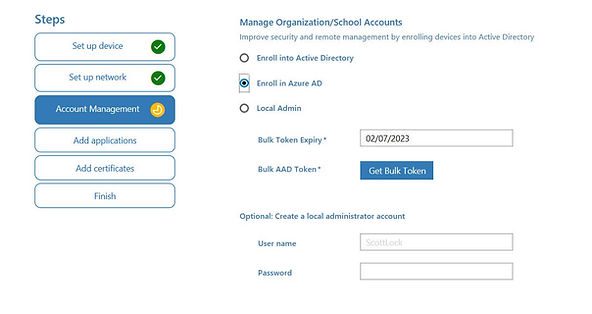
On the Account Management page, select Enroll in Azure AD , enter a Bulk token Expiry date, and then click on Get Bulk Token. The token validity period is 180 days.
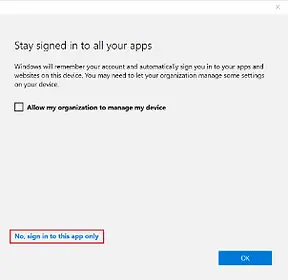
Important: On the Stay signed in to all your apps page, select No, sign in to this app only. If you press OK, the device you are using will become managed by your organization. If you do not intend for your device to be managed, make sure to select No, sign in to this app only.
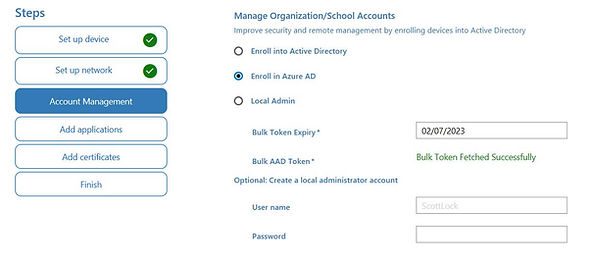
You will be prompted for Azure AD sign-in. Login with user Azure AD account to proceed.
Click Next when Bulk Token is fetched successfully.
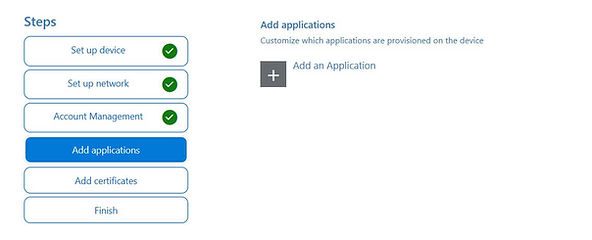
The Add application is an optional page, you can add the application which you want to install through provisioning package.
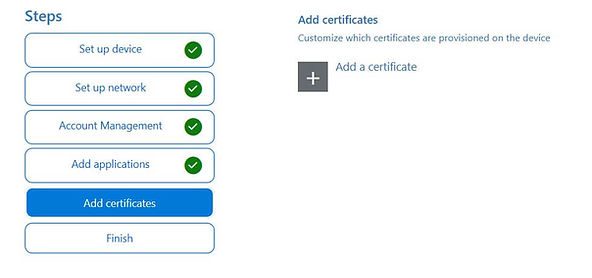
The Add certificates is an optional page, you can add the certificate which you want to provision on the device.
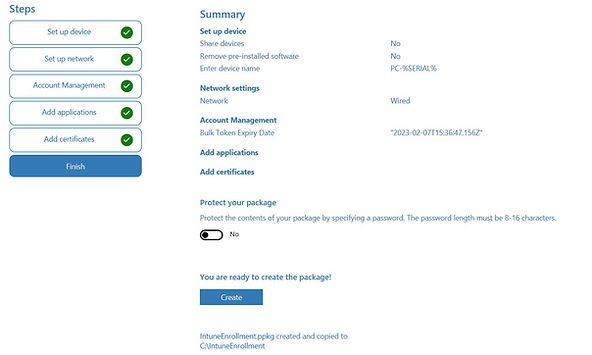
On the Finish page, review the details. You can protect your package with a password. Click on Create once you reviewed the details.
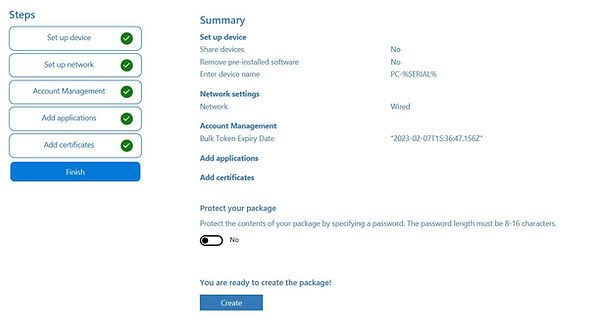
Once package is created, you will see the status message just below the Create button.
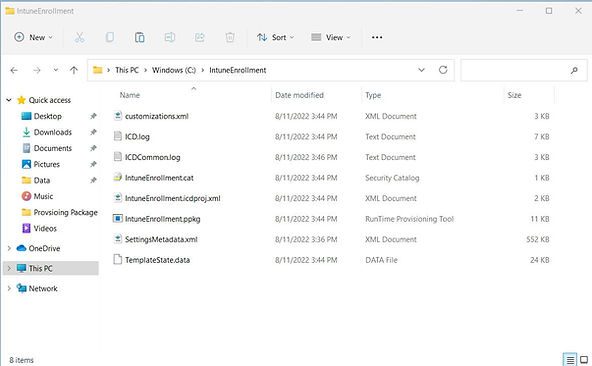
See the snapshot of folder where provisioning package was copied. The file with .ppkg is provisioning package executable.
Provision a Device Using Provisioning Package
We will apply the provisioning package manually on a test device to test the enrollment. The below steps need to be followed.
- Copy the provisioning package to a USB device or a network share.
- Access the provisioning package
- Double click on .ppkg file
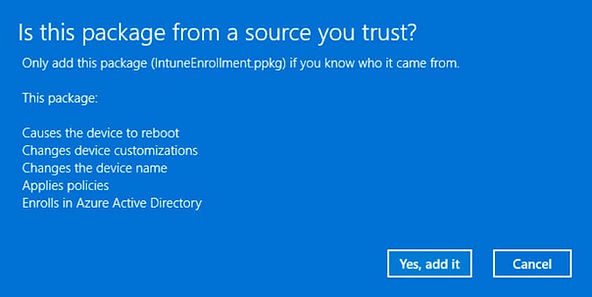
On the Is this package from a source you trust? window, click on Yes, add it.
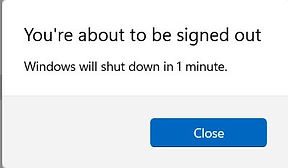
A provisioning package will apply and device will automatically restart in a minute.
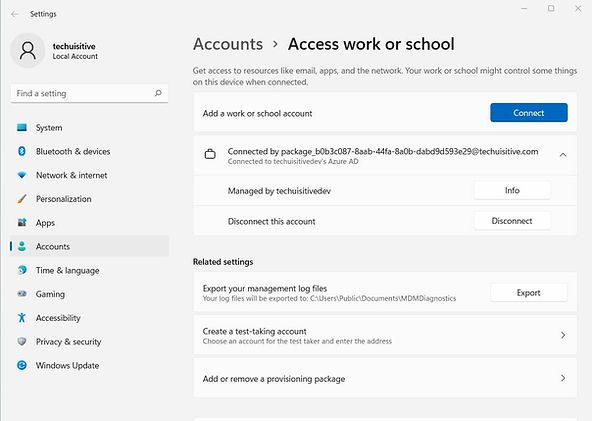
The device will be joined to Azure Active Directory post reboot. You can logon to the device using your organization user account. You can also see your organization tenant details in Settings > Accounts > Access work or school
You can notice Connected by package_xyz@yourdomain.com which indicates that device was enrolled by a provisioning package.
You can also see the status in Azure AD. The device is now Azure AD
Joined.

Different ways to apply a provisioning package
Provisioning package can be applied using different methods.
During initial setup
The provisioning package can be applied during initial setup from a USB. The USB must be inserted during OOB experience screen when you see Country / Region screen. If nothing happens when you insert the USB drive, press the Windows key five times and then follow the instructions.
After Initial Setup – Apply directly
Navigate to the provisioning package and double-click it to begin the installation. We discussed this method in previous steps.
After Initial Setup – Add from Access work or school account
A provisioning package can be also applied from Settings > Accounts > Access work or school > Add or remove a provisioning package
Related Posts
- SCCM Dynamic Collection for Windows 10 / 11 Devices
- SCCM SQL Query for Windows 10 / 11 Version Summary
- Configure Windows 10 / 11 Device as Kiosk | Microsoft Intune
- Windows 10 / 11 Operating System Build Versions
- Windows 11 enrollment failed with error 0x800700b7
- Enroll Windows 11 Device to Intune through Azure AD Join method | Corporate Devices
- Invalid_Client error when joining Windows 10 device to Azure AD tenant
- Join Windows 10 Device to Azure Active Directory
- How to Obtain Hardware Hash for Manually Registering Devices with Windows Autopilot
- Bulk enrollment of Windows 10/ 11 Devices to Intune
- Intune – Windows 10 MDM- Basic troubleshooting
- That account info didn’t work – error when disconnecting Windows 10 / 11 Work or School account
- MDM Enroll: Device Credential, Failed (Unknown Win32 Error code : 0xcaa9001f
Subscribe to Techuisitive Newsletter
Be the first to know about our new blog posts. Get our newsletters directly in your inbox and stay up to date about Modern Desktop Management technologies & news.