Google Chrome is the most popular and widely used desktop web browser. As of May 2022, Google’s Chrome is the leading internet browser in the world with a global market share of 64.91%. Hence Google Chrome deployment and management is a must for almost all organizations.
The Chrome browser for the enterprise, sometimes referred to as Chrome Enterprise, is the same Chrome browser used by consumers. The difference is in how the browser is deployed and managed. Chrome Enterprise offers extra deployment and management features that cater to the sector’s increased needs for control and security.
Let’s understand how to deploy Google Chrome for the enterprise through Microsoft Intune Win32 apps. We will cover step by step guide to deploy Google Chrome with Intune Win32 apps.
Prerequisites
The following criteria should be met for Win32 app deployment.
- OS version : Windows 10 version 1607 or later (Enterprise, Pro or Education editions)
- Devices must be enrolled in Intune and either:
- Azure AD registered
- Azure AD joined
- Hybrid Azure AD joined
- The application size must not be greater than 8 GB per app.
How to Download Google Chrome Enterprise
You can download the latest version of Google Chrome for Enterprise from below URL.
https://chromeenterprise.google/
Prepare Win32 App content for Intune
Intune Content Prep Tool for Win32 app allow the creation of a single package for deployment through Microsoft Intune. You need to prepare the installation source for Google chrome deployment via Intune win32 apps.
Follow “How to prepare app installation source for Intune” for the step by step guide to prepare Win32 app content for upload to Intune.
Create Win32 Application for Google Chrome Enterprise Deployment
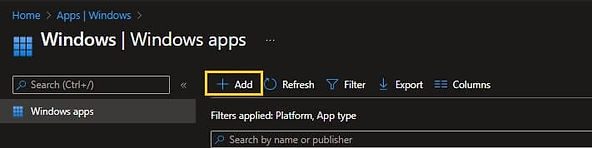
Login to Microsoft Intune Admin Center and navigate to Apps > Windows > Windows apps.
Click on Add
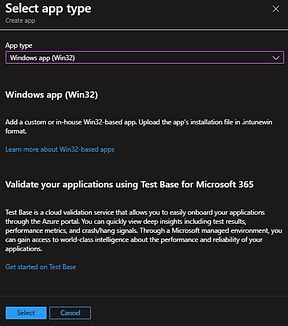
On the flyer window at right side of the screen, select Windows app (Win32) from App type drop down list and click on Select.
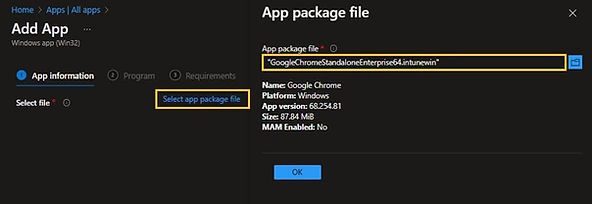
On the App Information page, click on Select app package file. Click on browse button and select the Google Chrome MSI file you downloaded earlier. Click on Ok to proceed.
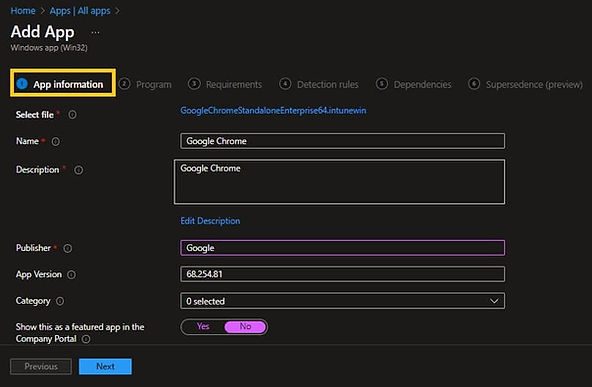
Fill the other details such as Application Name, Description, Publisher and version etc. in App Information page. Click on Next to move to the Program page.
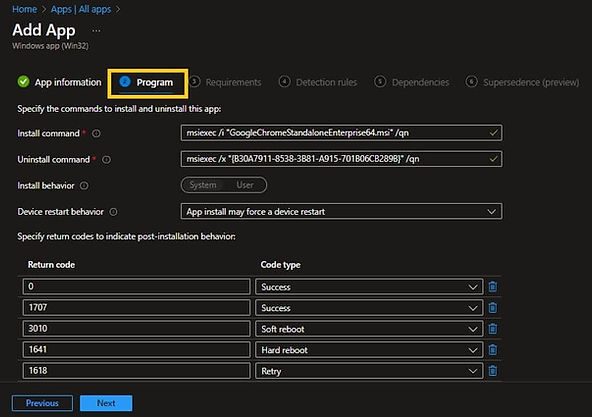
You will see that Install and Uninstall command lines are automatically populated from MSI package in Program page. You can make the changes as per your requirement.
For examples:
- You can update the command line to enable verbose logging
- You want to initiate the installation through a batch file or PowerShell script.
Click on Next to go to Requirements page.
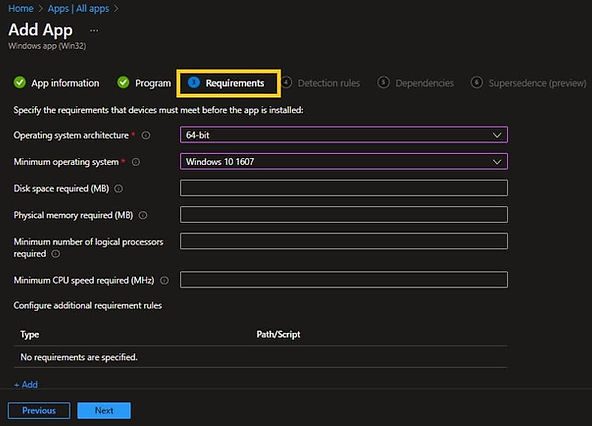
On the Requirements page, you need to configure the mandatory requirements at least. Win32 Apps Requirements are rules which must met for the application to get installed. You can specify the requirements when creating Win32 app. The application will install only if requirements are met.
We have configured following mandatory requirements for Chrome deployment.
- Operating System architecture : 64-bit
- Minimum Operating System : Windows 10 1607
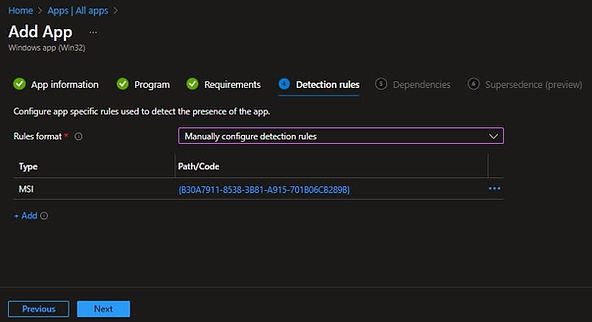
Click on Next to go to Detection rules page.
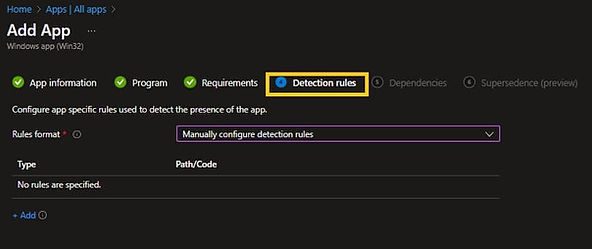
On the Detection rules page, you need to configure at least one Detection rule.
The Intune Detection Rules are used to determine the presence of a Win32App. The detection rules ensure that app installation only start if it’s not installed yet. The same Detection rules are also used to confirm the installation of application. Please follow this article to deep dive into Intune Win32 app detection rules.
To add a Detection rule, select “Manually configure detection rules” in Rule format and click on Add.
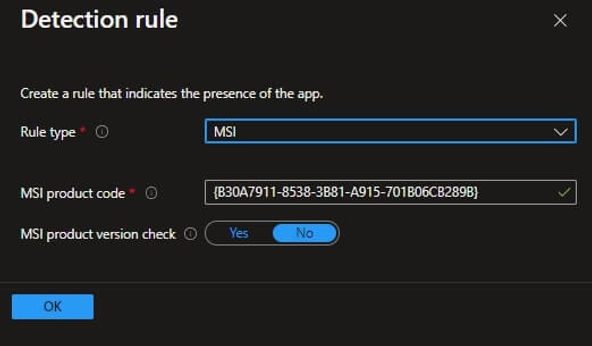
On the Flyer window, select MSI in Rule Type. In the most of the cases, the MSI product code will populate automatically. Otherwise, you need to provide the MSI product code.
Click on Ok to close the window.
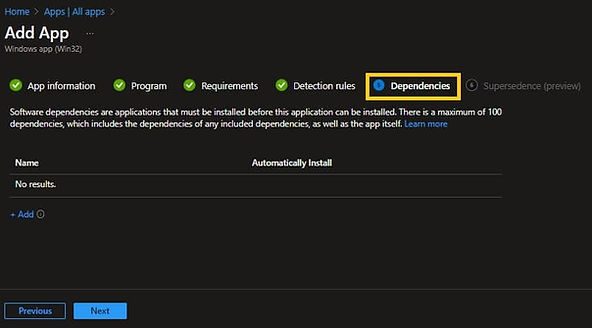
Click on Next to go to Dependencies page.
App dependencies are applications that must be installed before your Win32 app can be installed. Here can chain applications and it’s dependencies to get installed in a sequence. This setting is optional and it’s not required for Google Chrome. You can follow this post if you want to know more about Win32 App Dependencies.
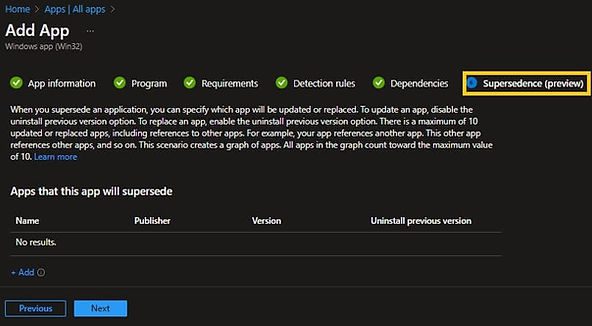
Click on Next to move to the Supersedence page.
In Microsoft Intune, Supersedence enables you to update and replace existing Win32 apps with newer versions of the same app or an entirely different Win32 app. This is an optional feature hence we will skip this.
You can follow this post to learn more about Supersedence relationship in Intune Win32 app.
Click on Next to go to Assignment page.
On the Assignment page, click on Add group under Required to add Azure AD Group on which you want to assign this application.
Select the AAD group from Flyer Window and click on Select to return to Assignment page.
You can also use the Assignment Filters to further narrow down the scope of deployment. Check out below articles if you want to learn more about Intune assignment filters.
Intune Filters – Assign Microsoft Store App policy using Filters
| Note: A Required deployments forcefully install the application on selected devices / groups. While Available deployments make the the application installation optional and user can install it from Company portal. |
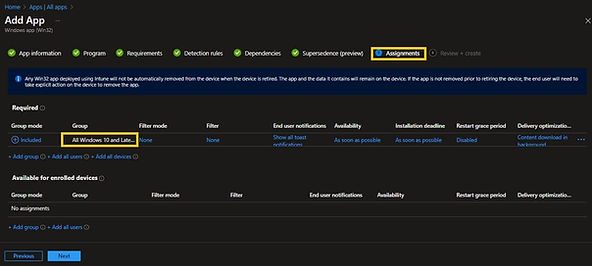
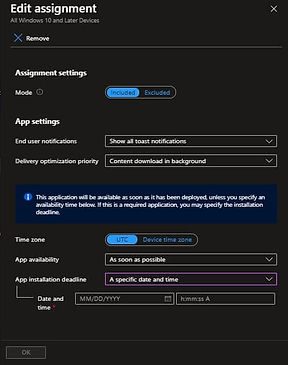
You can also configure the following settings on Assignment page.
- End User notifications
- Delivery optimization priority
- App Availability
- App Installation deadline
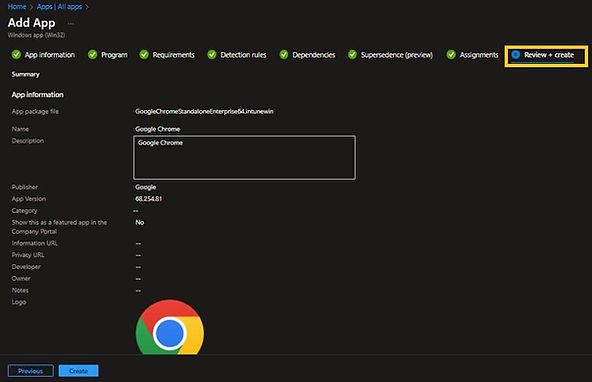
Click on the Next on Assignment page to move to Review + create page.
On the Review + create page, review the settings and click on Create.
You can monitor the progress from Notification area.
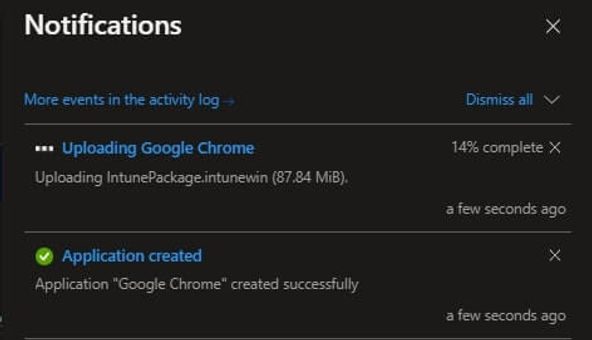
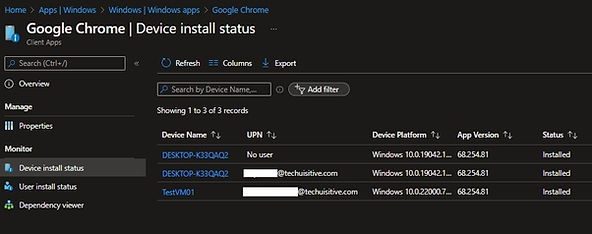
The Google Chrome application is now created and you can monitor the assignment status from Apps > Windows > < App Name>.
Related blog posts
- Understanding Win32 App Detection Rules
- Understanding Win32 App Requirements Rule
- Upgrade / Replace Win32 Apps with Supersedence Relationship
- Win32 App Deployment with Dependencies
- Win32 Apps vs LOB Apps
- Win32 App Deployment failed with error code 0x80070643
- Win32 App Deployment Failed with Error 0x87D1041C
- Win32 App Deployment failed with error 0x87D300C9
- Win32 App failed with error code 0x80070653
- Deploy Google Chrome for Enterprise with Intune Win32 App
- How to Prepare Win32 App Installation source for Microsoft Intune
- SCCM Device Collection Equivalents in Microsoft Intune for App Deployment
- Deploy Microsoft SQL Server Management Studio 19.02 through Intune
- Organizing Laptop and Desktop in Intune Using Filters
Subscribe to Techuisitive Newsletter
Be the first to know about our new blog posts. Get our newsletters directly in your inbox and stay up to date about Modern Desktop Management technologies & news.